There’s a boom in new home construction and we’re seeing a big increase in the number of new homeowners requesting sod installs through LawnGuru and asking how best to make sure their new lawn shines.
A new sod care timeline is essential for cultivating a healthy lawn. Begin by preparing the soil and conducting a pH test, ideally maintaining a level between 6-6.5. After installation, water the sod immediately and maintain a watering schedule of 2-4 times daily for the first two weeks. Gradually reduce watering frequency while increasing duration in subsequent weeks to encourage deep root growth. Begin mowing when the grass reaches 3-4 inches, following the one-third rule. Proper fertilization and monitoring for pests will also guarantee robust health. Investigate further to enhance your lawn care strategy effectively.
Easy Steps to Make Sure Your New Grass Thrives
Ensuring that new grass thrives involves a series of critical steps, starting from preparation before installation to ongoing maintenance in the weeks following.
Each phase, including immediate care and adjustments during the first month, plays an essential role in establishing a robust lawn.
Preparing Before Installation
Proper preparation of the soil is vital for guaranteeing that your new sod establishes quickly and thrives in its new environment.
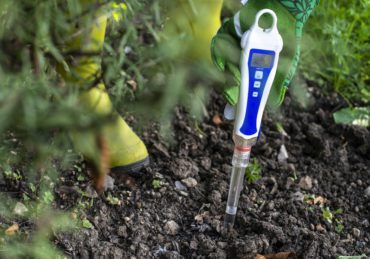
Begin by conducting a soil test to determine pH levels, as proper sod growth is contingent on ideal conditions; St. Augustine grass thrives at a pH of 6-6.5.
Once you have the results, amend the soil as necessary with 2-3 inches of compost to enhance drainage and nutrient availability.
Prior to installation, treat the soil with a quality pre-plant fertilizer to provide essential nutrients.
Confirm the soil is well-watered to retain moisture, which is critical for root establishment.
Immediate Care After Installation
Watering the new sod immediately after installation is essential for establishing a healthy root system and preventing dehydration. To guarantee proper watering, saturate the soil beneath the sod to a depth of at least 6 inches, ideally within 30 minutes of installation.
For the first two weeks, irrigate the new sod multiple times daily, aiming for 1 inch of moisture each day. Watering should occur in short bursts (2-6 times for 4-6 minutes), avoiding late evening sessions to minimize fungal risks.
Furthermore, refrain from foot traffic during this period to support root development. Monitor the sod closely for signs of browning or gaps, adjusting the watering schedule as necessary to promote ideal growth and establishment.
Care During the First Two Weeks
In the critical first two weeks after sod installation, establishing a consistent daily watering schedule is crucial for promoting root establishment.
Furthermore, protecting the lawn from foot traffic during this period will help guarantee that the new grass can develop without unnecessary stress.
Daily Watering Schedule
Establishing a consistent daily watering schedule is crucial for the successful establishment of new sod during the critical first two weeks.
Aim for a watering frequency of 2-4 times daily, using short durations of 4-6 minutes to maintain moisture without waterlogging.
This deep watering approach guarantees the sod remains adequately hydrated, promoting healthy root development and overall success in your new sod care efforts.
Protecting the Lawn from Foot Traffic
To guarantee the successful establishment of new sod, it is essential to protect the lawn from foot traffic during the critical first two weeks.
Keeping all foot traffic off newly sodded areas allows roots to establish properly.
Use ropes or stakes as barriers, inform family and guests, and consider signage to ascertain awareness, thereby promoting the health of your new grass.
Adjustments in Weeks 3 and 4
During weeks 3 and 4, it is essential to adjust your watering routine to foster deeper root growth and guarantee the long-term health of your new sod.
Reduce the watering frequency to 1-3 times a week while increasing the duration of each session. Aim for 30-45 minutes of watering on hot days, ensuring the moisture penetrates to a depth of 6 inches in the soil.
Early morning is the ideal time for watering, as it minimizes evaporation and helps prevent fungal diseases.
Pay attention to shaded areas, which may require less frequent watering due to slower drying times.
This strategic adjustment will encourage the grass to develop a robust, deep root system, setting the foundation for a thriving lawn.
Maintenance in Weeks 5 and 6
Maintaining proper care in weeks 5 and 6 is essential for guaranteeing your new grass thrives and develops a robust root system.
Continue watering your sod 1-3 times a week, allowing the soil to dry slightly between sessions to promote deep root growth. Monitor the grass for signs of stress, such as browning or wilting, and adjust your watering schedule as needed.
If the sod reaches a height of 3-4 inches, begin to mow, trimming only the top one-third of the blades to minimize stress.
At this stage, consider fertilizing with a balanced slow-release nitrogen option to support growth.
Moreover, limit foot traffic on the lawn until the roots are firmly established to guarantee peak development.
Why a New Sod Care Timeline is Essential for Lawn Health
Establishing a new sod care timeline is essential for preventing common mistakes that can jeopardize lawn health.
By adhering to a structured approach, homeowners can avoid issues such as overwatering or insufficient nutrient application, which can hinder root development.
This proactive management guarantees a vibrant, resilient lawn capable of thriving in various conditions.
Avoiding Common Sod Care Mistakes
Frequently neglecting a structured sod care timeline can lead to significant setbacks in lawn health, including poor root establishment and unsightly brown patches.
To guarantee the vitality of your new lawn, it’s imperative to water your new sod thoroughly within 30 minutes of installation and maintain a daily schedule of 1 inch of moisture during the first few weeks.
Furthermore, avoid walking on the sod for at least 14 days to protect fragile roots.
Proper lawn maintenance also involves delaying the first mow until the grass reaches a height of 3 inches, which typically occurs about one week post-installation.
How to Water New Sod for Deep Root Growth
Watering new sod is essential for establishing deep root growth, particularly in the first 14 days following installation.
A consistent watering schedule should be implemented, utilizing irrigation systems effectively to maintain ideal moisture levels.
This approach not only supports root development but also enhances the overall health and resilience of the lawn.
Watering Schedule for the First 14 Days
A consistent watering schedule during the first 14 days is vital for ensuring deep root growth and establishing a healthy lawn.
Immediately after installation, water your new sod to saturate the soil to a depth of 6 inches. For the first two weeks, water 2 to 4 times daily for short durations of 4-6 minutes each, aiming for 1 inch of moisture daily.
It is critical to monitor soil moisture closely; if the sod appears dry or brown, increase the watering frequency.
Watering should primarily occur in the early morning to optimize moisture retention and minimize the risk of fungal diseases.
Using Irrigation Systems Effectively
Utilizing an efficient irrigation system is essential for guaranteeing new sod receives consistent moisture, which is crucial for promoting deep root growth and overall lawn health.
To effectively water new sod, aim for 1 inch of moisture daily during the initial weeks post-installation. Implement a frequency of watering cycles that allows for 2 to 4 short sessions daily, lasting 10-20 minutes each, to guarantee water penetrates the soil to a depth of 6 inches.
It is advisable to water in the early morning to reduce evaporation and limit fungal risks.
As the sod establishes, gradually decrease the frequency of watering cycles while increasing the duration of each session, fostering deeper root growth and resilience in the lawn.
When and How to Mow Your New Sod
Mowing new sod is vital for establishing a healthy lawn, and timing your first mow is essential to promote robust growth.
Typically, the first cut should occur when the grass reaches about 4 inches, adhering to the one-third rule to remove no more than one-third of the blade height.
This practice not only minimizes stress on the grass but also encourages a denser and healthier lawn.
Timing Your First Mow
Timing your first mow is vital for establishing a healthy lawn, as it guarantees the new sod has adequately rooted and reached the ideal height for cutting.
Typically, you should wait about 14 days post-installation until the grass reaches a height of 3-4 inches.
For your first time mowing, set your mower to the highest setting to prevent scalping, and make certain you only trim the top one-third of the grass blades.
Utilizing a walk-behind mower will provide better control and reduce the risk of damaging the delicate sod.
Mow during dry conditions, preferably in the early morning or late afternoon, to achieve a clean cut and minimize stress on your new lawn.
Proper timing and technique are vital for long-term lawn health.
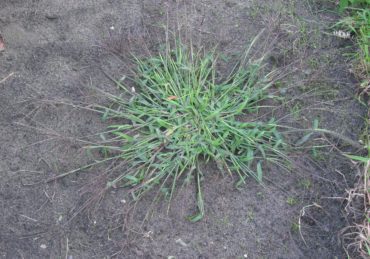
The One-Third Rule for Grass Cutting
The one-third rule is a fundamental guideline for mowing new sod, emphasizing that only the top one-third of the grass blades should be cut during each session to promote healthy growth and minimize stress on the lawn.
This practice not only encourages the development of deeper roots but also enhances the structural integrity of the grass.
For ideal results, set your mower to a height of 3 inches and maintain a consistent mowing frequency of every week or two during the growing season.
Adhering to the one-third rule helps shade the soil, reducing weed growth and ensuring a healthy lawn.
Furthermore, using sharp mower blades will yield clean cuts, further supporting the overall health of your new sod.
Fertilizing New Sod for Optimal Growth
Fertilizing new sod is essential for promoting ideal growth and establishing a robust lawn.
Selecting the right fertilizer and adhering to a structured fertilization timeline are key elements in this process.
Choosing the Right Fertilizer
Selecting the appropriate fertilizer is essential for promoting ideal growth in newly installed sod.
To effectively fertilize new sod, it is vital to use a balanced fertilizer with a higher nitrogen content during the initial application. This nutrient supports vigorous green growth and aids in establishing a robust lawn.
Aim to apply 1-2 pounds of nitrogen per 1,000 square feet, 2-3 times annually, to sustain peak nutrient levels.
Prior to fertilization, testing the soil pH is important; for instance, St. Augustine grass thrives best within a pH range of 6-6.5.
Furthermore, consider utilizing slow-release fertilizers to guarantee a consistent supply of nutrients, enhancing lawn health while minimizing nutrient runoff.
Fertilizing Timeline for New Sod
Establishing a strategic fertilizing timeline is vital for ensuring ideal growth and health in newly installed sod. Fertilization should commence at least one month post-installation, allowing roots to establish before introducing nutrients.
For best growth, apply a balanced fertilizer low in nitrogen and higher in potassium and phosphorus during early spring or late fall. Throughout the growing season, new sod can benefit from 1-2 lbs. of nitrogen per 1,000 sq. ft. applied 2-3 times annually.
Subsequent fertilization can utilize products like Nutrila 33-0-5 + Iron in spring or summer, followed by Scotts Turf Builder Fall Lawn Food for seasonal preparation.
Maintaining proper soil pH between 6-6.5 is essential for maximizing nutrient uptake and overall lawn health.
Final Tips for a Successful New Sod Care Timeline
How can homeowners guarantee the success of their new sod installation through diligent care and attention to key maintenance practices?
First, prioritize watering; make certain the sod receives 1 inch of moisture daily for the initial weeks, adjusting frequency as the roots establish.
Mowing should commence approximately 14 days post-installation, trimming only the top one-third of the grass blades to minimize stress on the new lawn.
Monitor soil moisture closely to encourage deep root growth, and limit foot traffic to prevent damage during the establishment phase.
Furthermore, inspect regularly for pests and diseases to maintain overall health.
Following these essential tips will enhance the resilience and health of your sod, ultimately leading to a thriving, beautiful lawn.
Learning how to care for new sod is easier than you’d think! If you want to learn how to keep it this way forever, we wrote a guide that you can lean on for year round advice on what to do and when to do it.